Abstract Booklet: Mail Merge method
These instructions explain how to create the book of abstracts in a semi automatic way: contributions will be exported from Indico and, via a LibreOffice mail merge, an RTF file with all the abstracts will be created. The RTF file will then be used to create a PDF having all the styles, pages and graphics needed for the conference.
Here LibreOffice is used but this method can also be used with different Office suites.
Export of contributions
In Indico go to Organisation > Contributions.
In principle all contributions should be put in the abstract booklet, but it's also possible to filter out what you don't want to include with the "Filters" button.
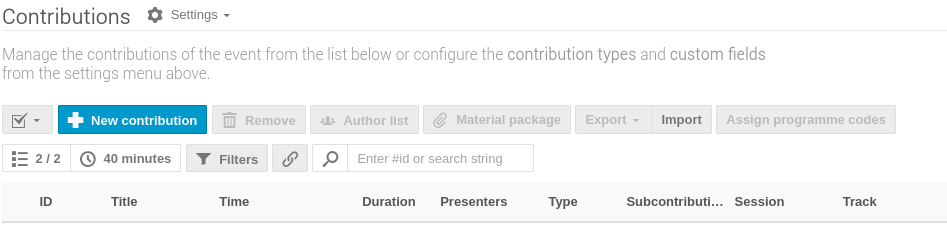
Then, select All the filtered contributions with the top-left checkbox menu, open the Export menu/button and choose XLSX (Excel). You will download a contributions.xlsx file which will be used as the database for the mail merge.
Cleanup of spurious characters in the abstract content
Sometimes authors paste the abstract description (content) from some word processors. This can introduce bad characters in the database which result in funny text when exported. Here follow some examples of these bad characters:
| funny text | meaning |
|---|---|
_x005F_x000D_ |
force newline inside a paragraph |
It is necessary to get rid of these texts. The easiest way to achieve this goal is to use the Find and replace tool in LibreOffice. Usually searching the wrong word and replacing with an empty string is sufficient. Feel free to search & replace throughout the whole spreadsheet.
Tip: for similar taks in LibreOffice Writer an Alternative Find & Replace for Writer (AltSearch) extension is available.
Order of contributions and additional data
The order of the rows in the spreadsheet will be the order of the abstracts in the final mail merge document. In principle it is possible to use the "Date" column, which includes both date and presentation time for the contribution, as a Sort order field. However, there are two issues:
-
this field is of type text, not date;
-
the time is wrongly calculated also for posters.
For these reasons it may be useful to create two additional columns for the date and time, then sort on them. Better so, we suggest to sort by Date and Programme Code. The new date and time columns, however, will be useful as fields in the mail merge.
In particular, provided that the exported "Date" column in the spreadsheet is in column D and the contribution Type in column F, the following formula in a new column will provide a real time only for orals and a blank cell for posters:
=IF(ISERROR(SEARCH("oral";F2;1));"";TIMEVALUE(RIGHT(D2;LEN(D2)-FIND(",";D2;1))))
For this to work well it is also necessary to set the numerical format of this new column to something like Time (HH:MM).
Mail Merge master document
When the database is ready a master document (also called Form Letter) for the mail merge can be created, preparing the basic layout for the list of abstracts. Let's consider the following layout as an example:
MOA - Monday - Name Of Session / 22 August 09:30-11.30
Chiar: G. O. Welles
ProgrammeCode - Time of presentation
Title: quibus sitasperum andi te esequae eum es ut eium
Authors: W. Kandinsky (Insitute 1), L. Marinetti (Institute 2) Text of the abstract
...
The initial "header" for the session (first two lines) will be inserted manually after the mail merge. Hence, it is recommended to create a Writer document with the other lines in the example. Every line should have a unique Writer Style created: doing so, and after having performed the merge, it will be really easy to modify the styles and introduce the exact font, size and attributes needed for the final document to be printed.
Save this new template document and then move to connecting it to the database for the mail merge.
Mail Merge
Follow the basic Mail Merge Wizard steps to connect the created document to the abstracts database. Be sure to insert the mail merge fields in the document where appropriate and maintain the styles created in the previous section.
After the preparation, create the merged document for review . This document will be rather special: every abstract will be put in a separate, odd page.
Getting rid of page breaks and final formatting
Getting to the final document is now easy: save it to RTF, then edit the new document adding all the bells and whistles wanted (like the session headers seen above).